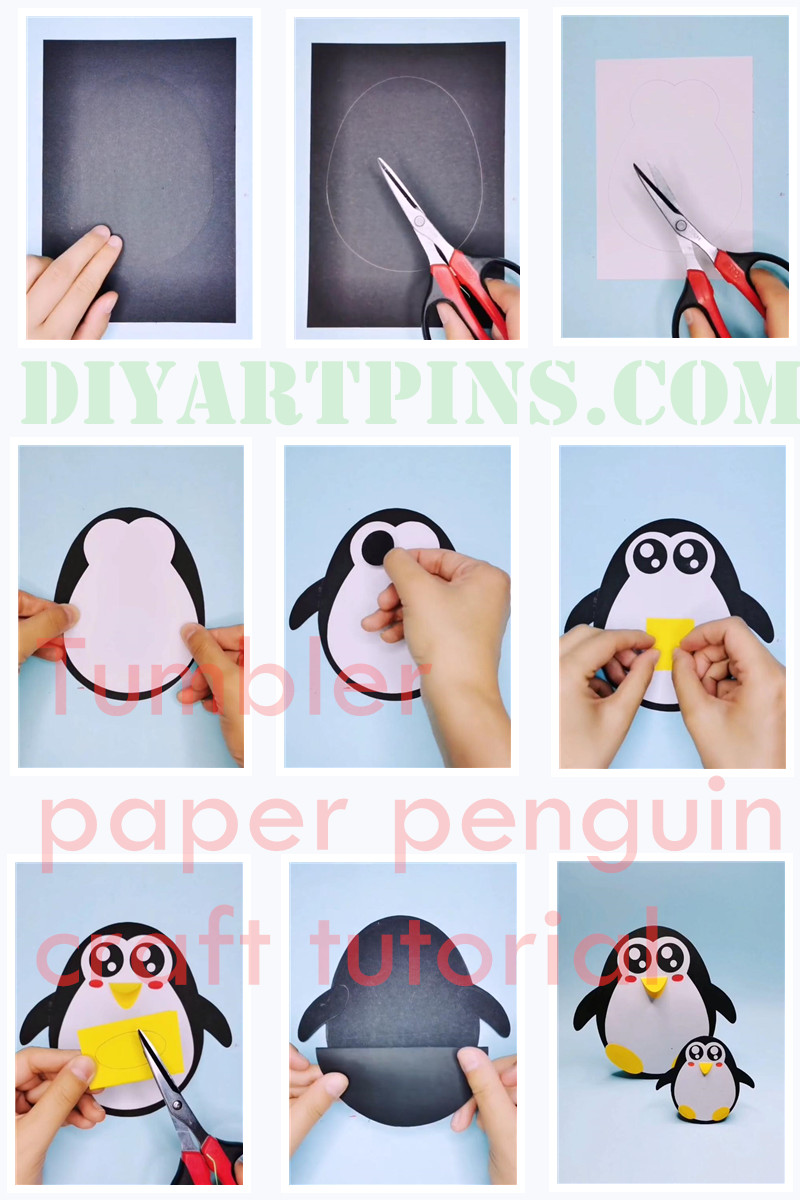
We can see penguins in the zoo, and we know that they come from the cold Antarctic region. They have thick fat, so the area is cold. They walk around and sway and look very cute.
Do you know how to use paper to make a penguin that can swing? After reading this tutorial, you can easily make a penguin with paper. The tutorial is very simple and suitable for babies over 3 years old.

1.Prepare a piece of black A4 paper, and then draw an oval on it. This oval can be used as a penguin's belly.
2.Use scissors to cut out this oval shape, and then use a pencil to draw such a shape on white A4 paper as shown in Figure 3.
3.As in Figure 4, paste the white piece of paper in this shape on the black oval piece of paper.
4.Paste the eyes and mouth of the penguin as shown in Figure 5 and Figure 6.
5.As in Figure 7, cut out two ellipses and paste them on the bottom of the black ellipse as the "feet" of the penguin.
6.Finally cut out a black circle, fold it in half and paste it on the back of the penguin, so that it can be placed in a standing position.
Is the tumbler paper penguin craft tutorial very simple? We can put the finished paper penguin on the table, flick it left and right with our fingers, and it will immediately swing. If you also like this cute penguin, follow this tutorial and quickly do it with your kids.


